 Using this
command, parts of a page or entire pages which you want to use more often
in other drawings or in other positions on the current drawing can be
selected and saved.
Using this
command, parts of a page or entire pages which you want to use more often
in other drawings or in other positions on the current drawing can be
selected and saved.
Using this
command, parts of a page or entire pages which you want to use more often
in other drawings or in other positions on the current drawing can be
selected and saved.
There are different ways available for selecting the individual elements which you can use in any sequence or as often as you wish.
Hint
This does not apply to the SLI range function
Activate the menu option, then an entry dialog appears in which you will have to enter a name for the drawing macro to be created. The drawing macro should be stored in the corresponding directory otherwise it will be difficult to find again. The standard dialog is already defaulted with this directory so that you only have to enter a name. If you do not enter a file extension, this will automatically set to 000.
Example
Select the individual parts of the drawing (in this case, the Windows method). You need to position the cursor as accurately as possible (tolerance of a few pixels).
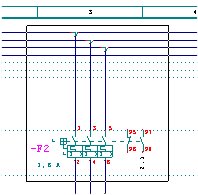
After menu option activation, you must select an option in the menu, top left in the working window in order to determine the choice of objects belonging to the drawing macro.
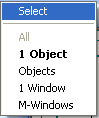
Possible choices
Finish the selection by clicking on the right mouse button and confirming with the <ESC> key. Each multi-selection is finished with <ESC> or the right mouse button. Also pay attention to the status display on the status bar at the bottom of the screen.
Hint
You can only extract parts selected by means of the M window by using ‘Objects’ to select again from the selection.
Tip
Using your own drawing macro will speed up your work significantly.