Print
 WSCAD 5 uses a printer installed
under Windows for printing out drawings and lists. This can be configured
independently from another printer which is used exclusively for the label
printout. When starting the program for the first time, both printers
will be configured to the Windows standard printer configured in your
system. If you wish to invoke this command, a dialog will appear
which will offer you a large number of options in controlling the output.
WSCAD 5 uses a printer installed
under Windows for printing out drawings and lists. This can be configured
independently from another printer which is used exclusively for the label
printout. When starting the program for the first time, both printers
will be configured to the Windows standard printer configured in your
system. If you wish to invoke this command, a dialog will appear
which will offer you a large number of options in controlling the output.
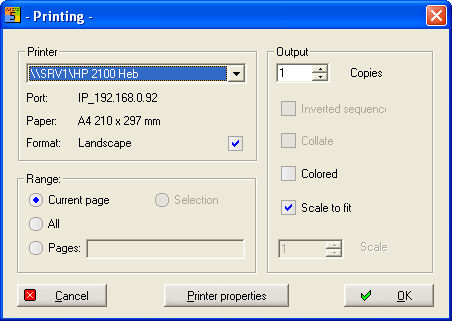
Printer
For your information, see where your printout
will take place. If one of the pieces of information in the printer area
does not correspond to how you would like it or you would like to check
other printer parameters, this can be done via Printer properties. The
printer dialog, which may vary from printer to printer (depending on the
printer features), will then appear.
Output
The page range of the printer output can
be determined under Output. You can still decide whether the sequence
of pages printed out should be reversed (i.e. starting with the highest
page number) and/or, in the case of multiple copies, whether the pages
should be sorted (i.e. 1,2,3….1,2,3) or unsorted (i.e. 1,1,...1,2,2,....2,3,3,3.....3).
It does not matter whether you enter the last or the first page first
in a page range. The colour option can only be activated when the
printer driver of your printer is able to provide a colour printout. If
you select the option automatic sizing, then each page (whatever
the drawing format) will be adjusted to the remaining printable area of
the page format configured in the printer. On the other hand, if you select
a fixed scale, then this factor will be applied to all printouts.
However, if the available area on the paper is too small, a message will
appear informing you of how many sheets the page will be divided into.
You can either accept this or abort the printout.
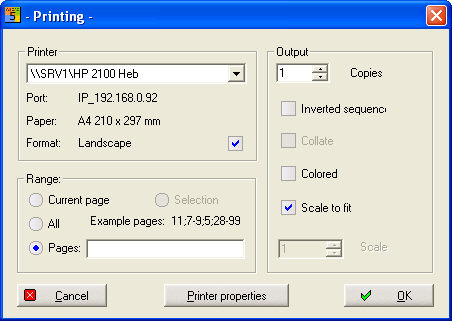
Page area
If you have selected an
area marked with a rectangle on the circuit diagram page, you can print
just this selected area alone with the option Select. Otherwise,
either just the open page will be printed out or the pages which have
been entered.
Tip
You can very easily
divert the printer output into a file by configuring your printer to do
so under Windows (Control panel – Printers). Printing can be very easily
carried out directly from the Project Manager.
Line weight
On popular request from users, a feature
has been added for adjusting the line weight of thin lines according to
personal preference (the settings are located under Settings/Common
Settings/Printer).
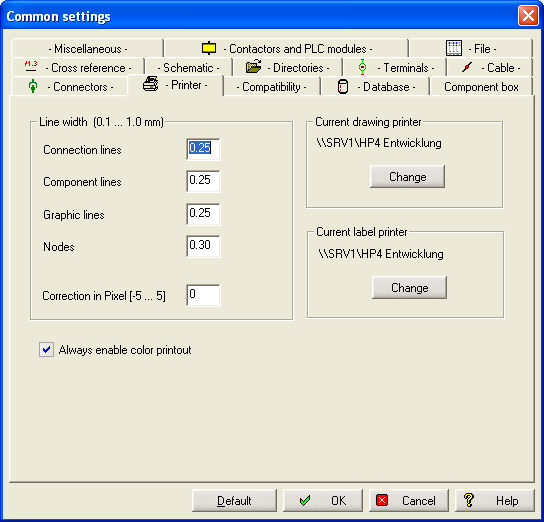
For certain line types, you can
adjust the line thickness to Line weight 1 (thinnest line). The
option Correction in pixels is another option for adjusting the
printout. Because some printer drivers do not represent the colour correctly
and the option of the colour printout in the printer dialog therefore
cannot be activated, it is always possible to override the printer driver
data using the colour switch. Adjust the printer dialog according to whether
you really want to print in colour.
Hint
In most cases, printing
colours on a black and white printer usually results in grey scaling.
The two buttons for the printer selection operate the same as the menu
commands File / Change printer.
Changing printers
WSCAD 5
manages 2 different printers:
 One for the drawing output
 One for the label output
The printers
are managed separately, i.e. changes to one printer have no effect on
the other printer. Under modern Windows systems, it is very easy to set
up several printers with different settings. WSCAD 5 does not remember
the settings but just the names of the drawing and label printers. Select
which printer you wish to change and a Windows standard dialog will appear
for the printer configuration.
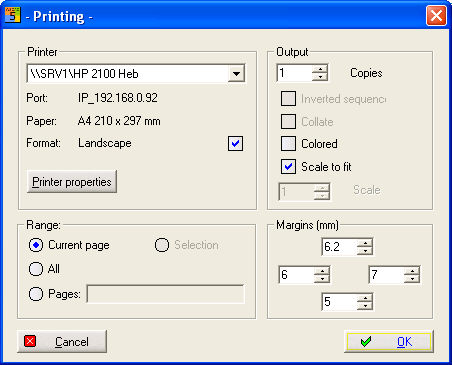
With the aid of this dialog, it is possible to choose
between all the printers which are available under Windows and, of course,
change the default standard values such as paper size or orientation.
When you have confirmed with OK, all information from the Windows
printer driver is copied (e.g. margins and interface etc.).