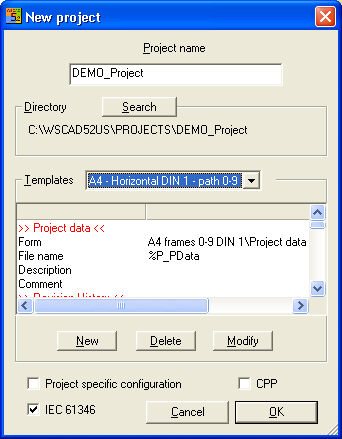
To create a new project, start up the Project manager and activate the menu item 'Project – New'. This opens up the dialog 'New project'.
In the Project name field at the top, enter the name of the new project (see above). You can then choose either to set the working directory yourself via the Search button, or to use the standard setting which stores the project name in a subdirectory of the preset project path (Settings – Common Settings - Directories).
To avoid always having to set the general parameters of a project such as the drawing frames for the schematic diagrams or the forms for the various lists, WSCAD uses Templates. The descriptive texts and comment texts are copied into the new project. They can be used in automated listings in the various forms (e.g. the cover sheet).
Note
These templates 'note' the references for the forms, drawing frame, file name and optional texts for all file types that are handled by WSCAD.
DIN 61346 This option has the effect of applying the new DIN libraries to the new project. After a standard WSCAD installation, the DIN libraries are located in the directory which was configured in the configuration under Parameters / General / Directories / Field libraries 61346. If the option DIN 61346 has been switched on, the database field designation DIN 61346 is used for the assignment routines between DIN symbols and items and many processes then relate to this setting. Otherwise, the DIN 40719 option is used.
Project-specific configuration You can define whether a project-specific configuration (WS_PRJ50.INI in the project directory) should be created or whether you are able to work with the global configuration WS_WIN.50.INI and (WS_PRJ50.INI in the Windows system directory). The advantage is that you retain the settings in regard to the configuration which apply to this project and do not transfer them to other projects when changing the project
CPP (Combined Part Project) This option has the effect of converting the project to a CPP project.
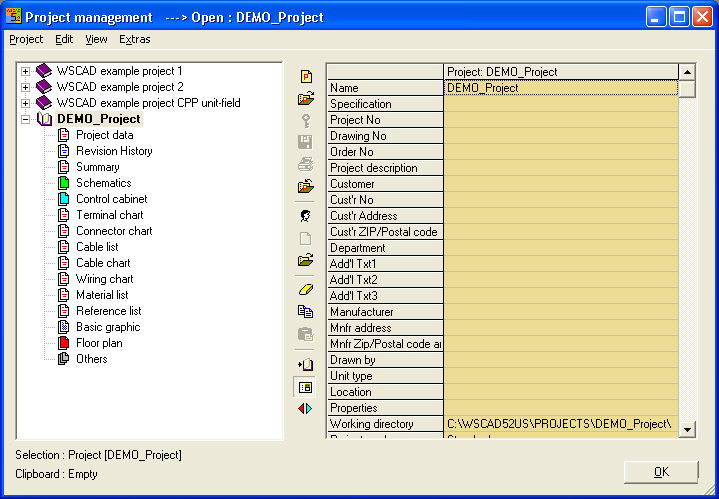
You will also see the folders belonging to the project for the respective file types. (Cover sheet, Change state and Contents information etc.). In the right hand working window of the Project Manager, you can supplement all other project data (Name, Description, Number and Customer etc.) of the individual projects according to need.
Example
New project Demo_ProjeCt in the automatically created DEMO_ProjeCt directory
Hint
You can assemble different templates and save them under different template names.
Tip
By using specific templates for each of your project types, it is very easy to ensure that your projects have a uniform appearance.
Summary of procedure
You can also change the project-specific configuration options, the project mode (standard or CPP) and the standard (DIN 61346) again later on. Now click on the OK button in the New project entry dialog. The dialog will close and the configured template data will be saved in the project.