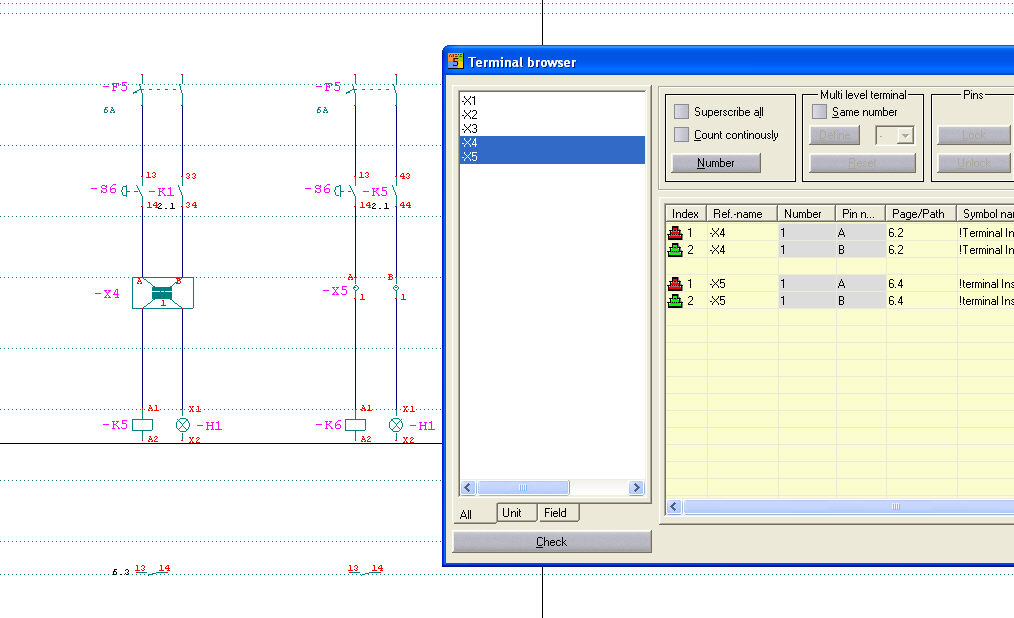
Create a terminal with, for example, 4 connections (2 internal and 2 external). Simply imagine a square with 2 pins on its top surface and 2 pins on its bottom surface. However, when creating the symbol, make sure that the first two pins which you create are on top of one another (in other words, first the pin on the bottom left and then the pin on the top left and so on). When numbering, the automatic uses the two connection points drawn first only. Set the assignment destination by giving the pin names at the top the values A or B or even a or b (remembering that each pin with an assigned pin number is internal). You now have a symbol which has 2 internal and 2 external connections. During numbering, the automatic counts the connections as one.
Under Parameter lists, specify that the pin names of the terminal connections on the terminal diagram are attached to the pin numbers. They will then be given the terminal connection designations 1A and 1B etc.
In the example you will see that. Terminal X4 has been created as a separate multi-storey terminal, as described above. The identical result is obtained when using terminal symbols (Xterminal) and assigning to multi-storey terminals in the terminal browser later on (significantly easier and more flexible).